Automated Version Control
Figure 1

Figure 2

Figure 3

Figure 4

Setting Up Git
Creating a Repository
Figure 1
 Werewolf
vs dracula by b-maze
/ Deviant Art. Mars
by European Space Agency / CC-BY-SA 3.0
IGO. Pluto
/ Courtesy NASA/JPL-Caltech. Mummy
© Gilad Fried / The Noun
Project / CC BY
3.0. Moon ©
Luc Viatour / https://lucnix.be / CC BY-SA
3.0.
Werewolf
vs dracula by b-maze
/ Deviant Art. Mars
by European Space Agency / CC-BY-SA 3.0
IGO. Pluto
/ Courtesy NASA/JPL-Caltech. Mummy
© Gilad Fried / The Noun
Project / CC BY
3.0. Moon ©
Luc Viatour / https://lucnix.be / CC BY-SA
3.0.
Tracking Changes
Figure 1

Figure 2

Exploring History
Figure 1

Figure 2

Ignoring Things
Remotes in GitHub
Figure 1
Figure 2
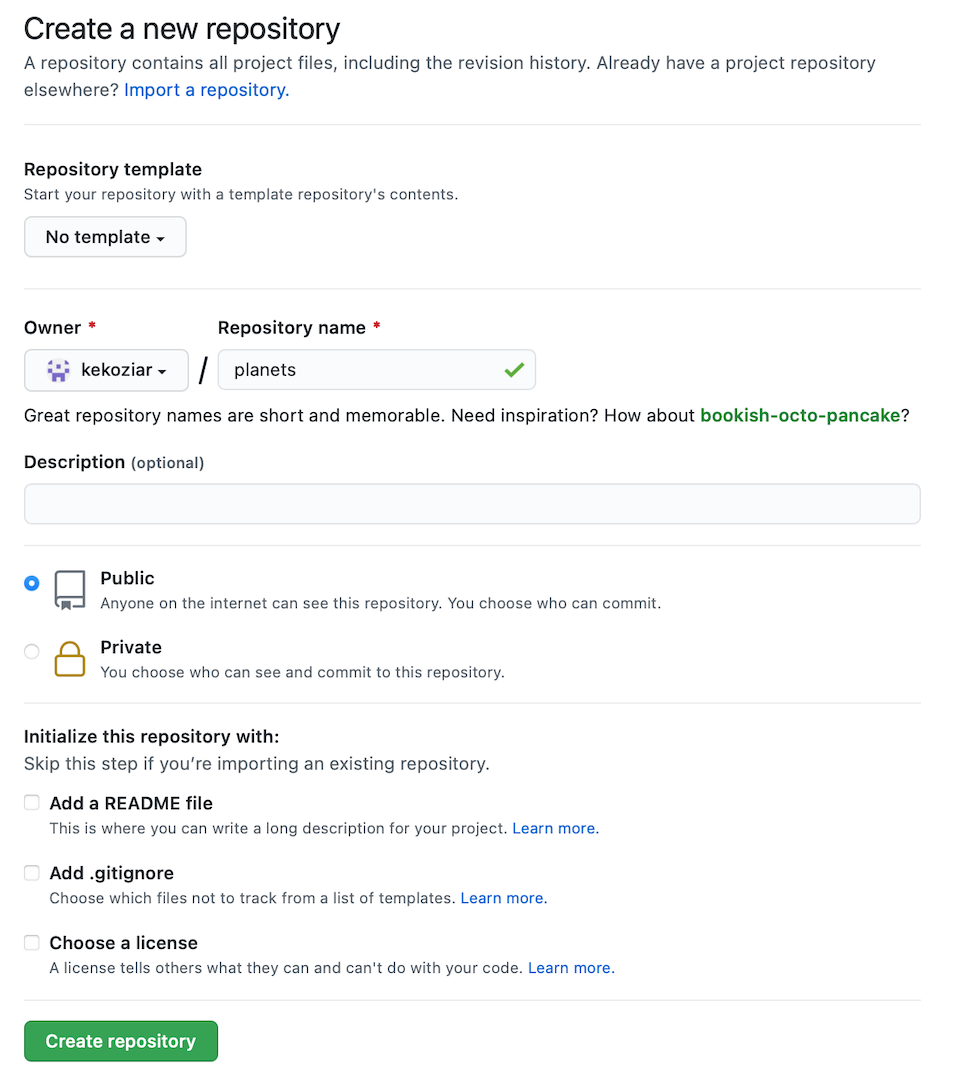
Figure 3
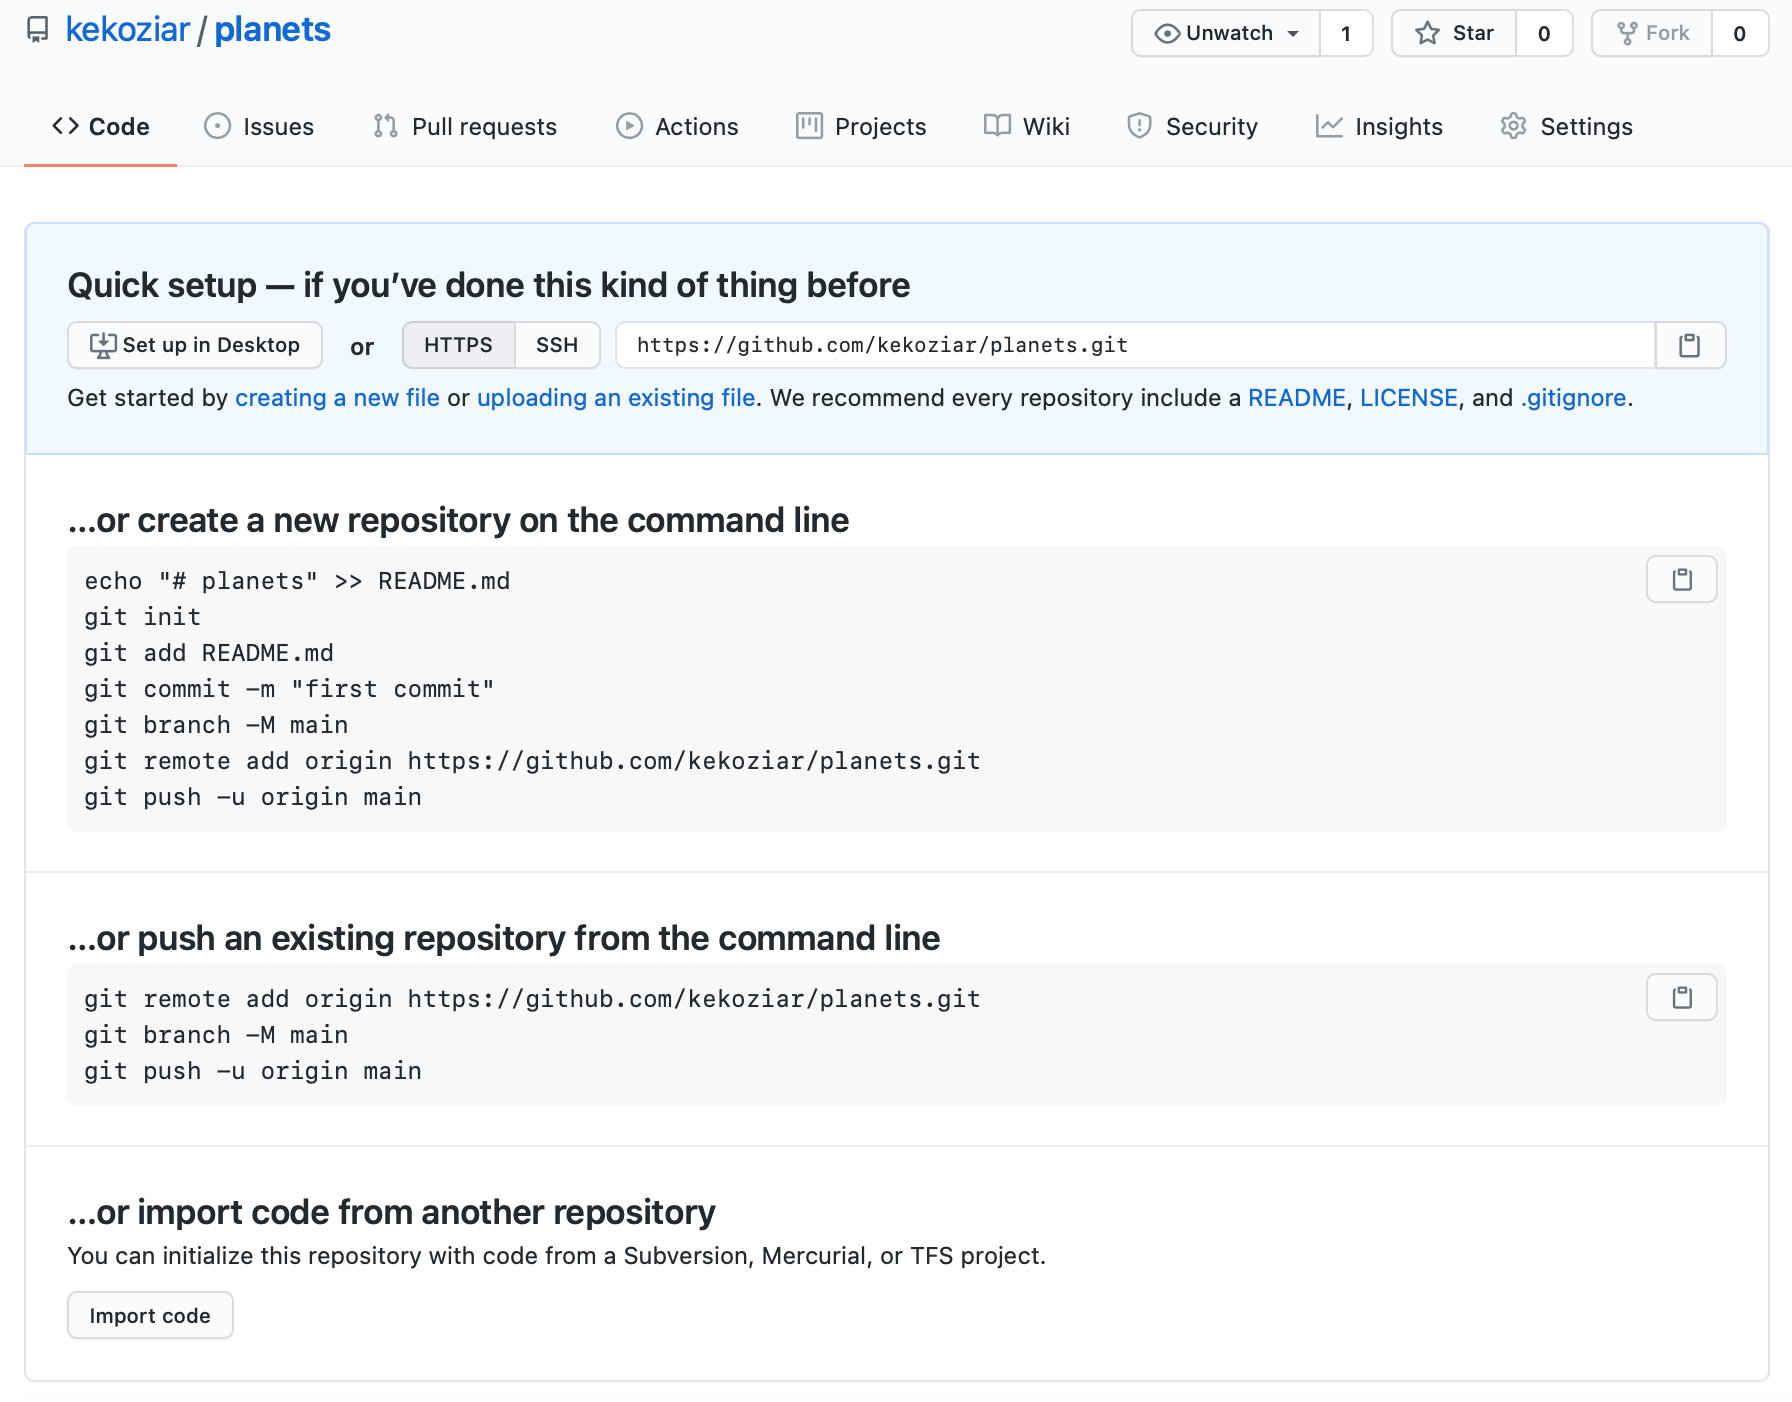
Figure 4
Figure 5

Figure 6

Figure 7

Figure 8

Collaborating
Figure 1
Figure 2

Conflicts
Figure 1

Open Science
Licensing
Citation
Hosting
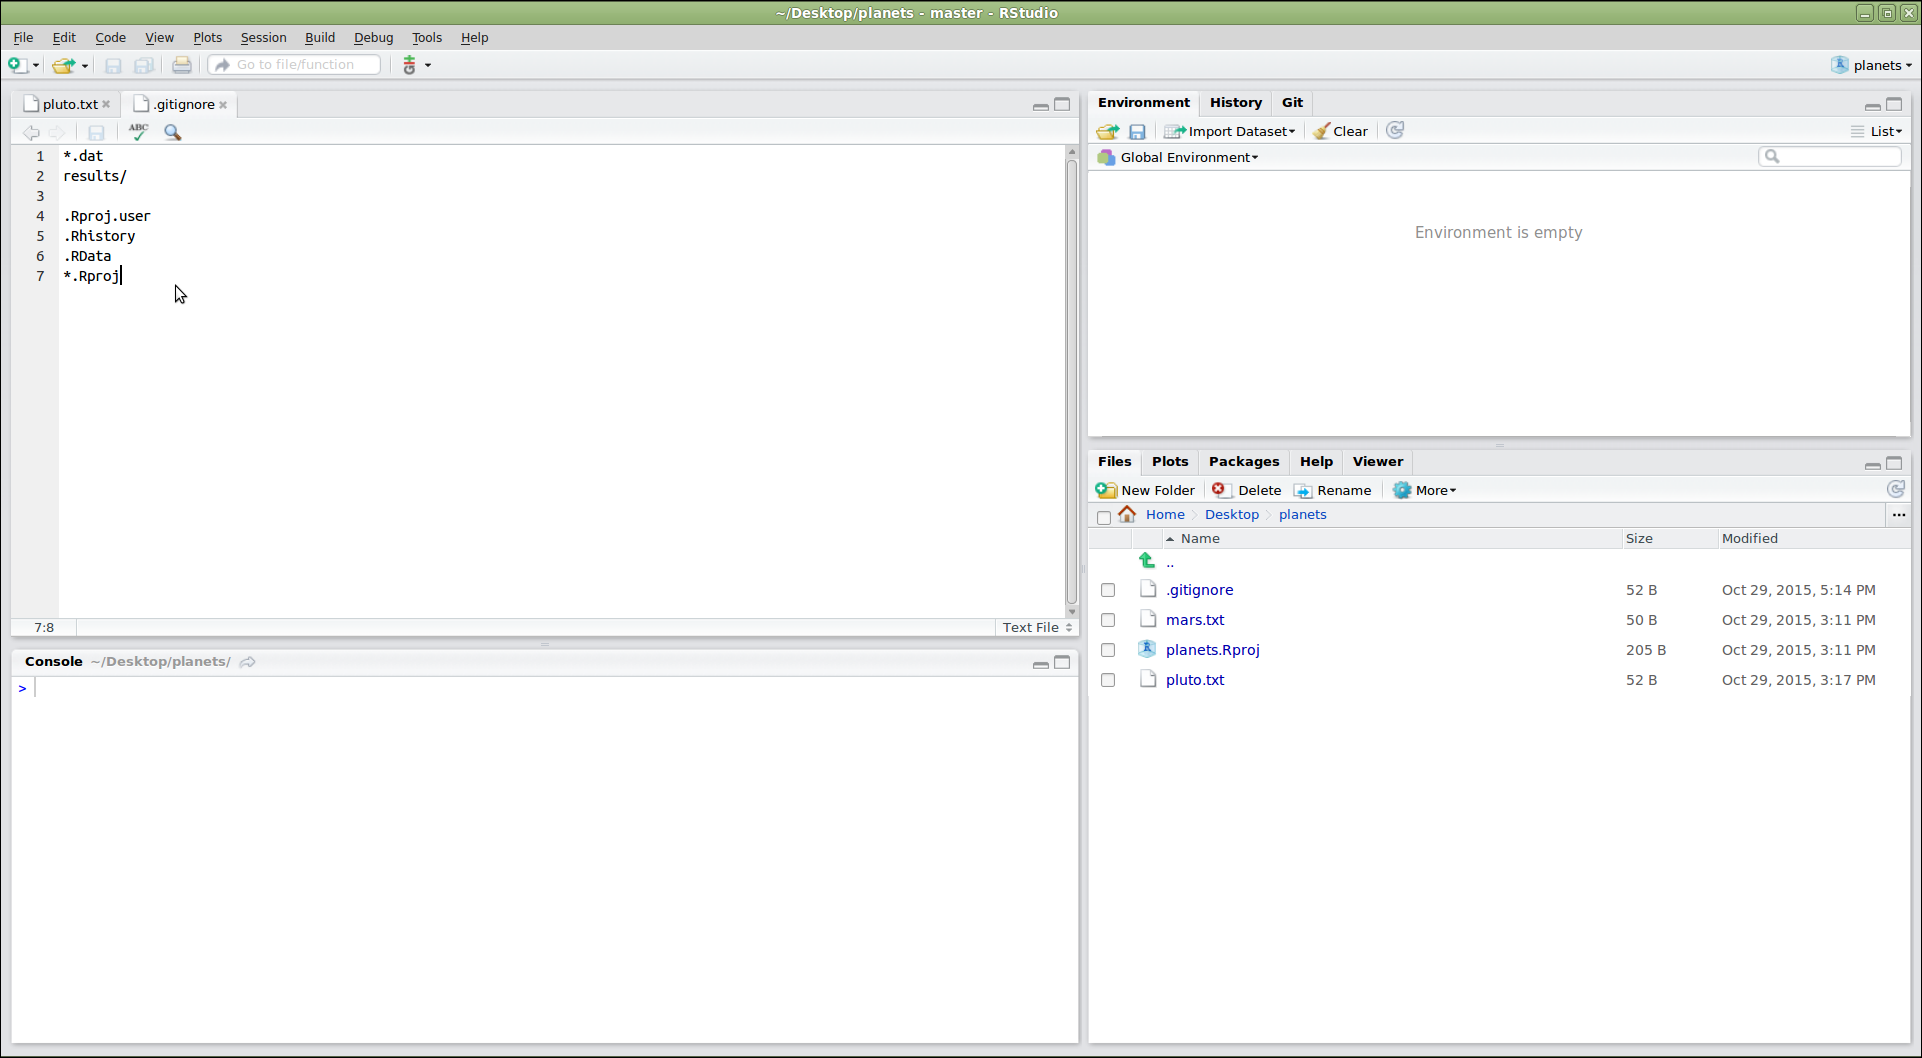
Supplemental: Using Git from RStudio
Figure 1
Figure 2
Figure 3
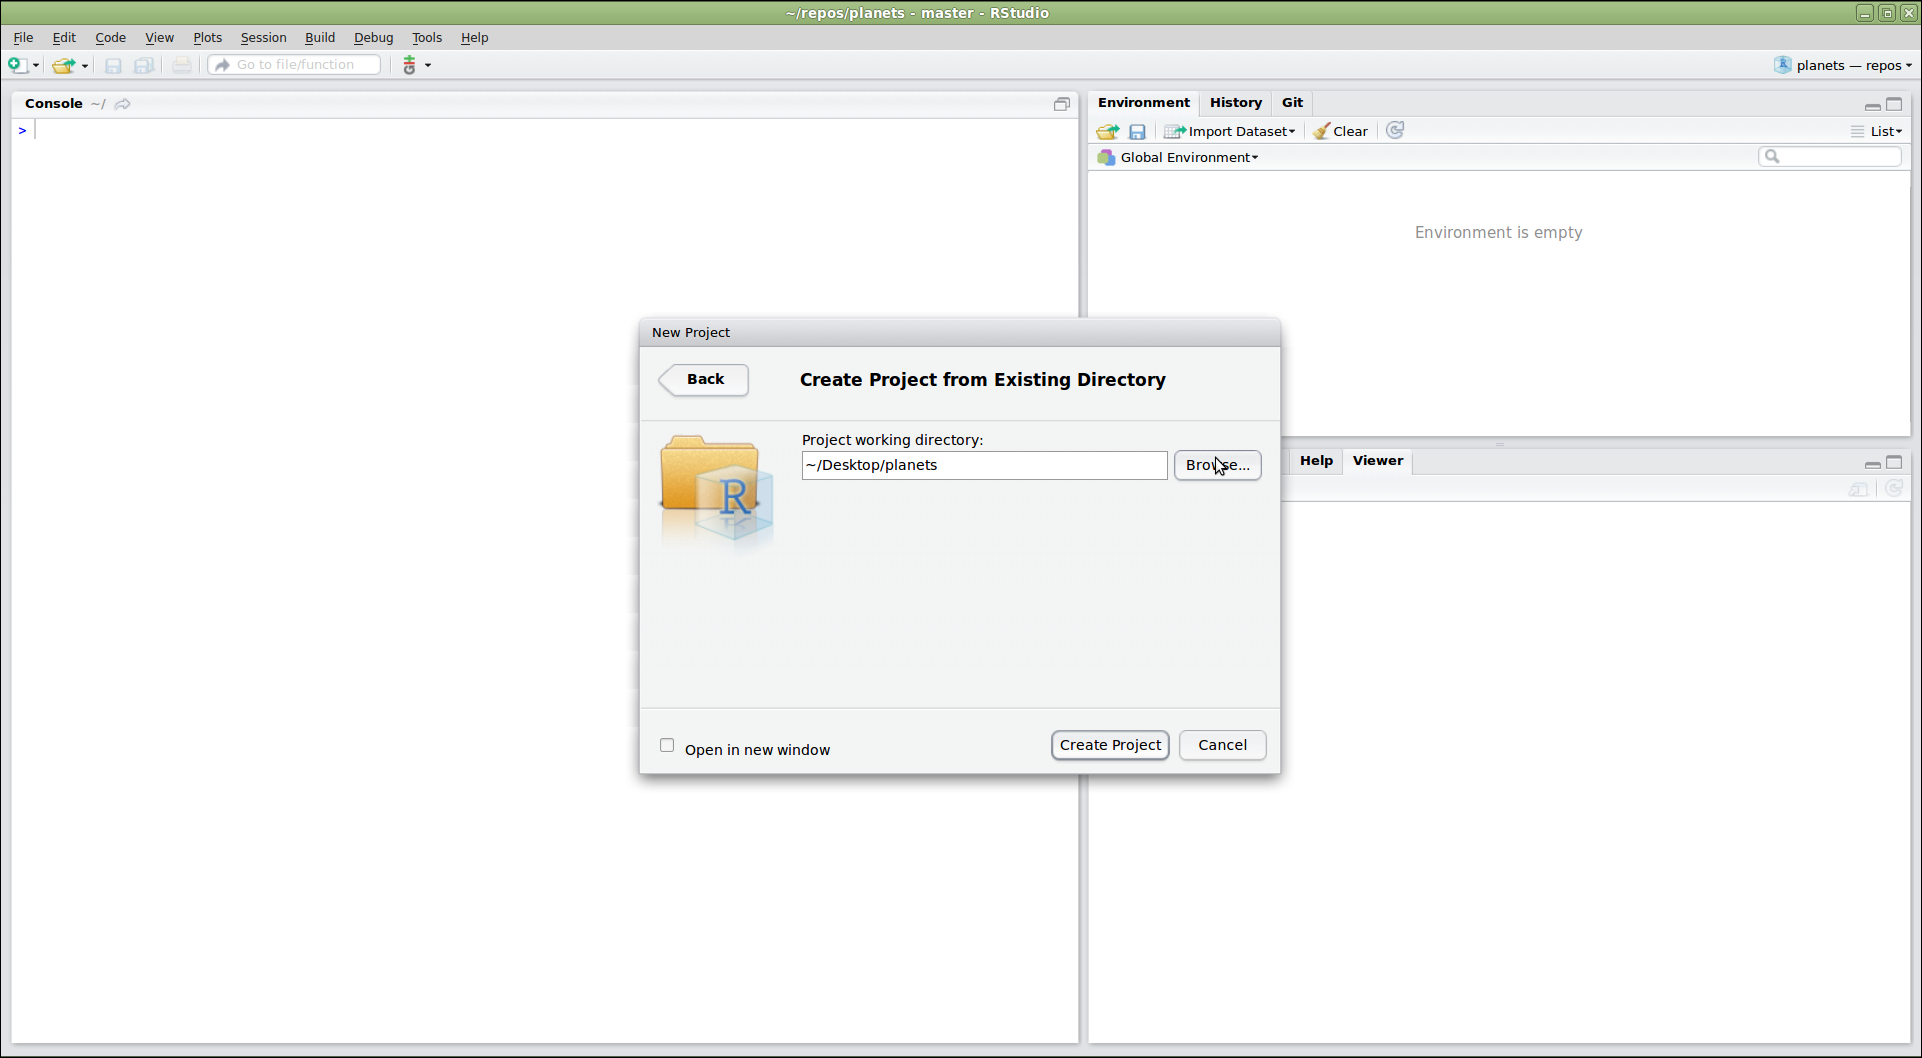
Figure 4
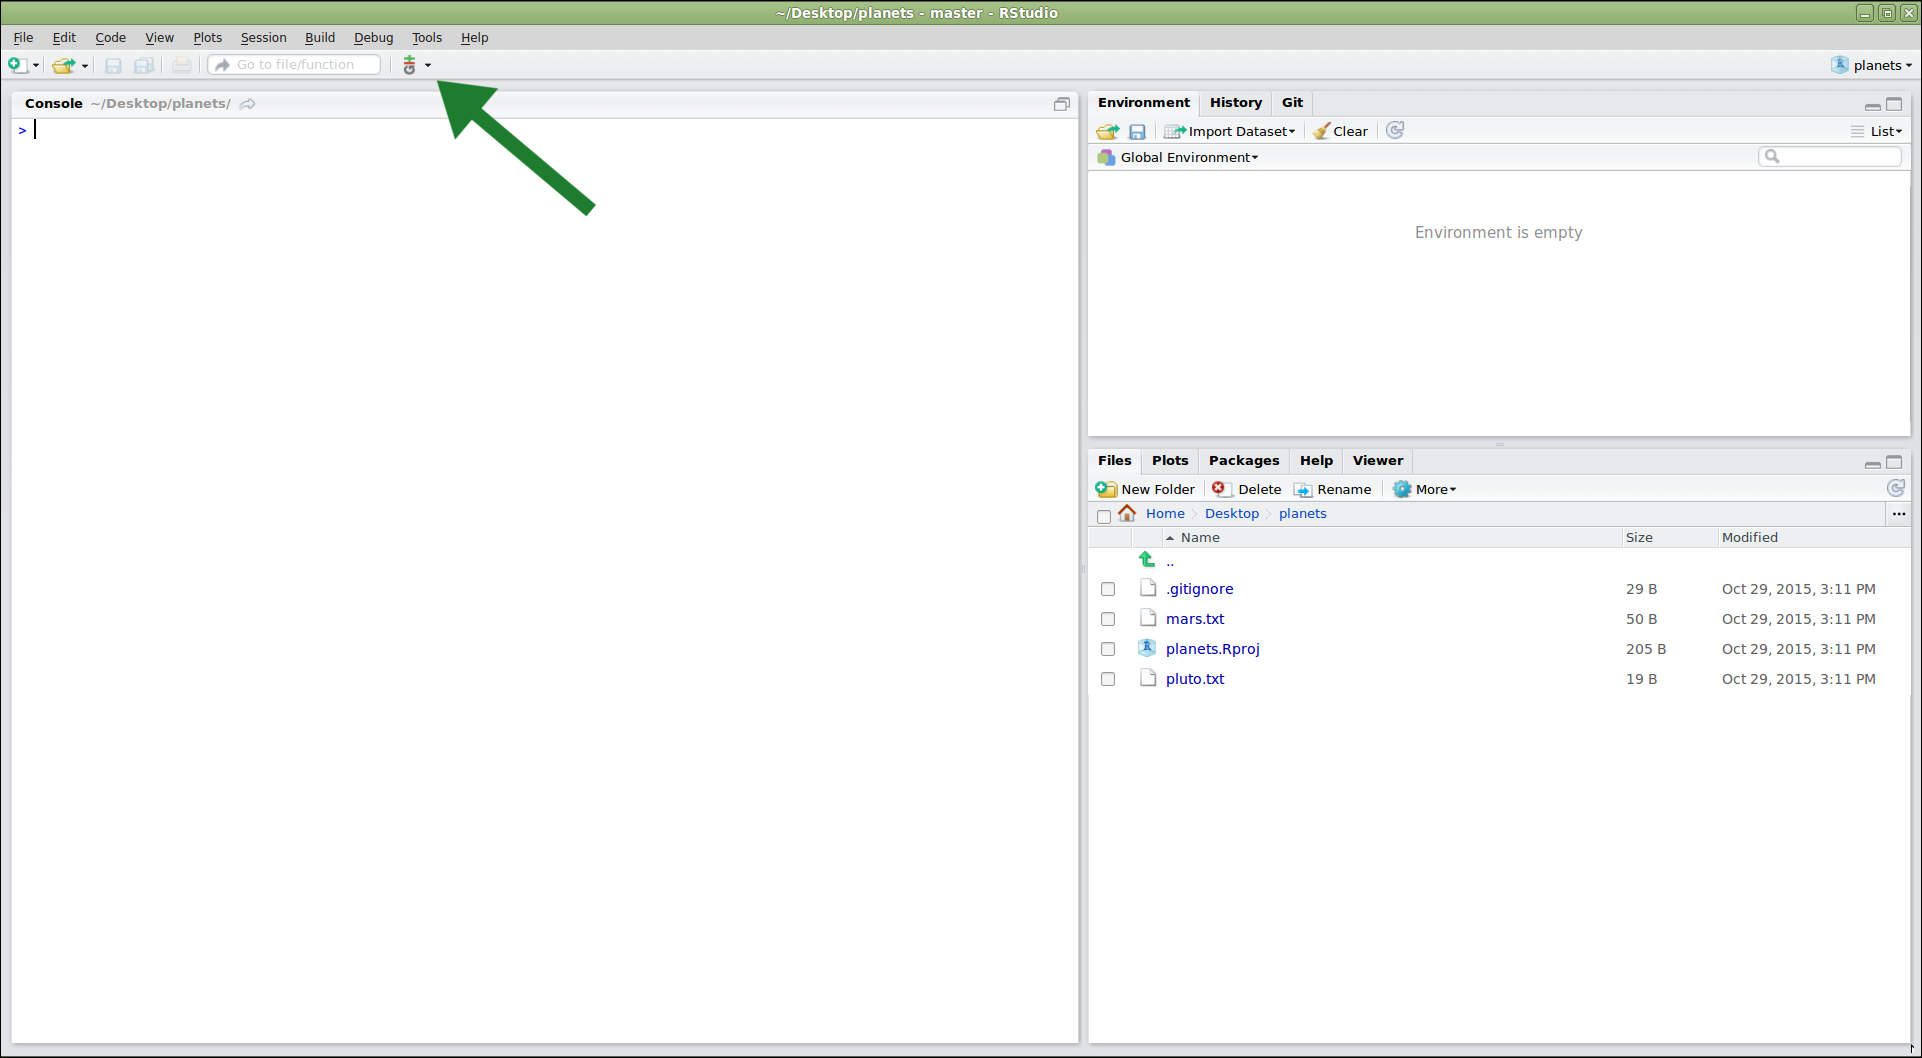
Figure 5
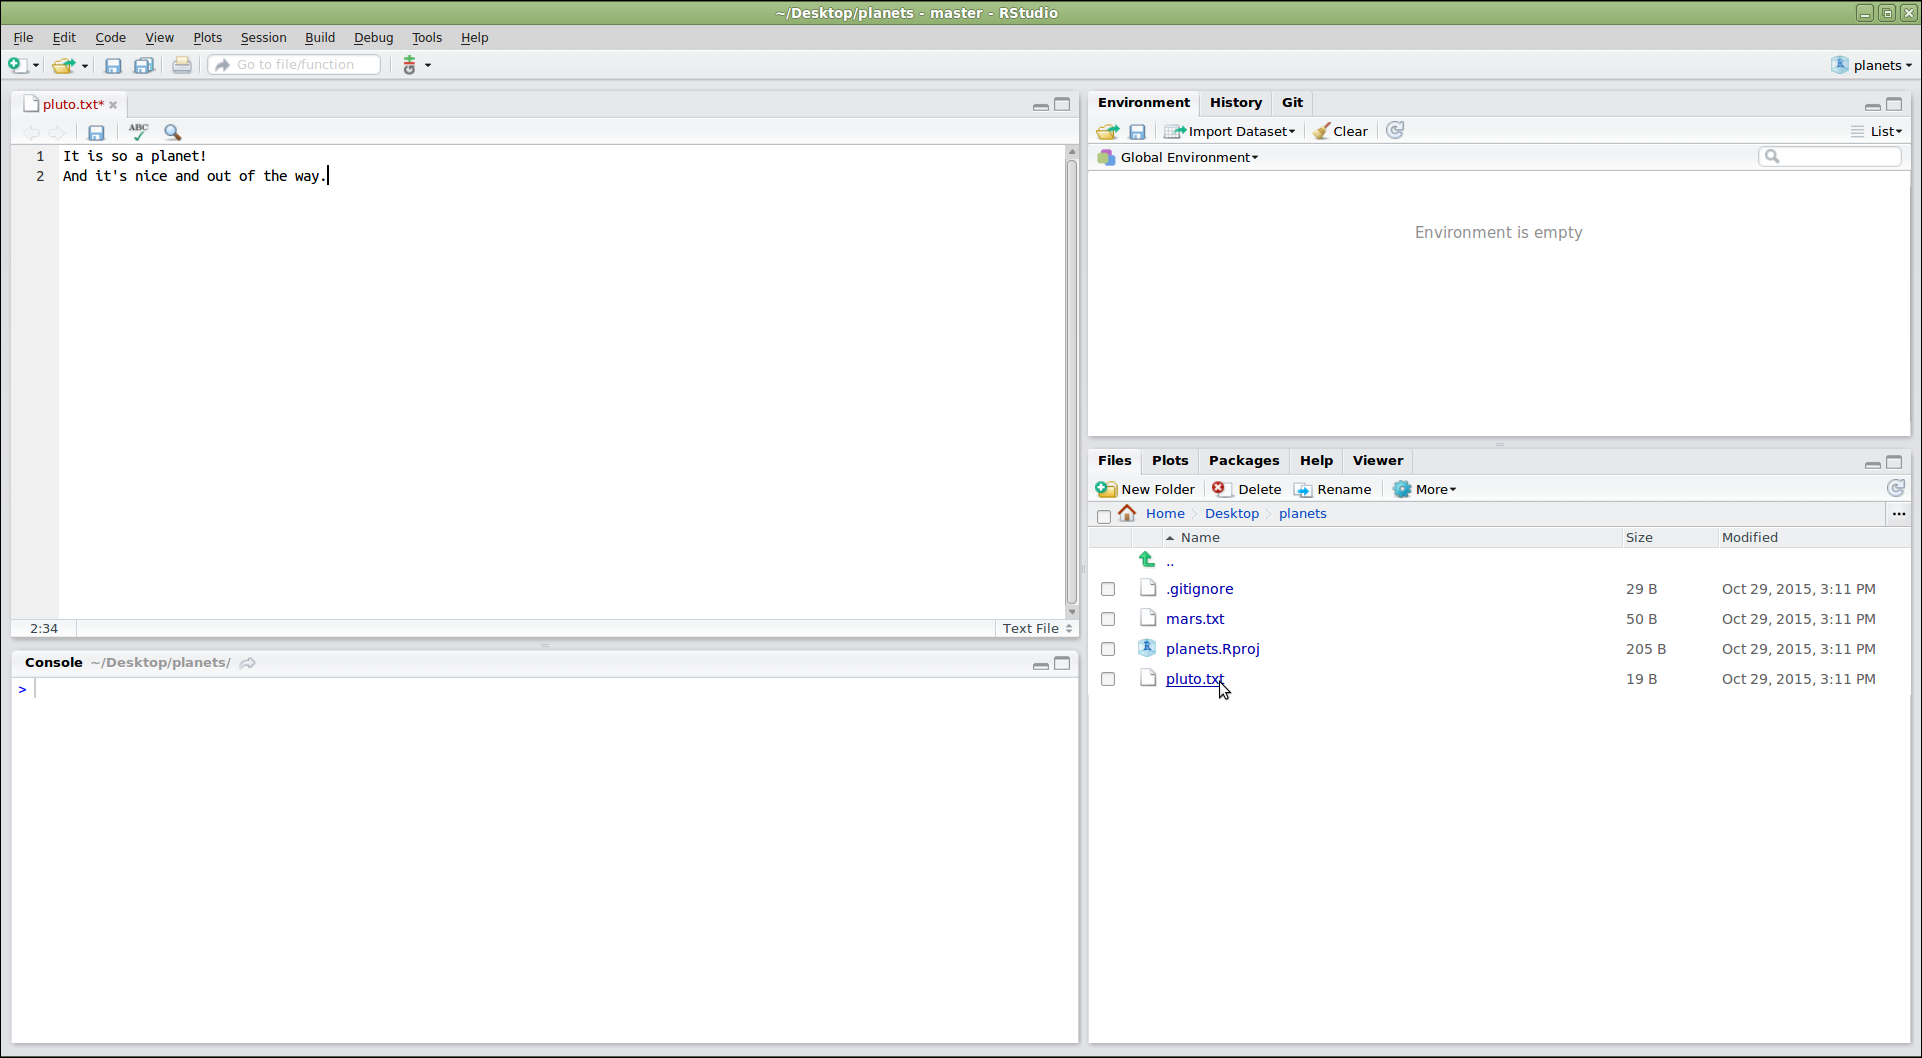
Figure 6
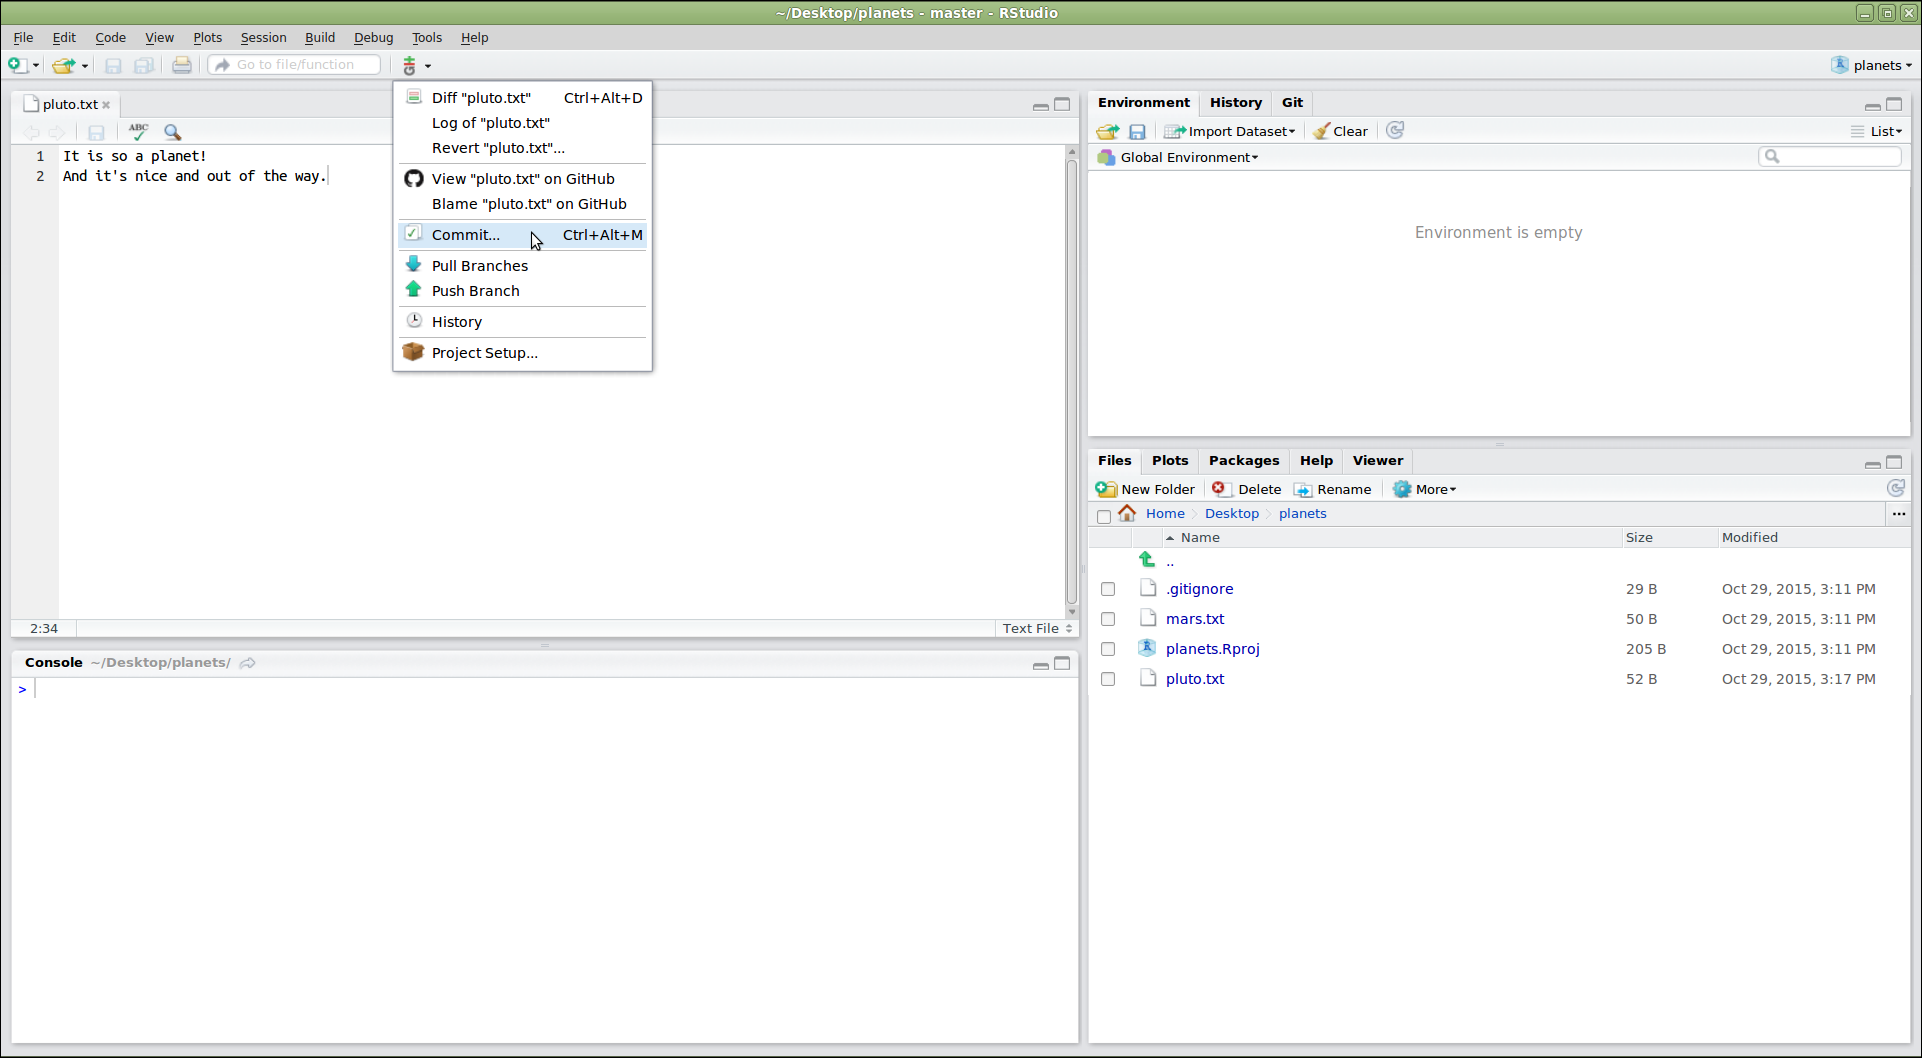
Figure 7

Figure 8
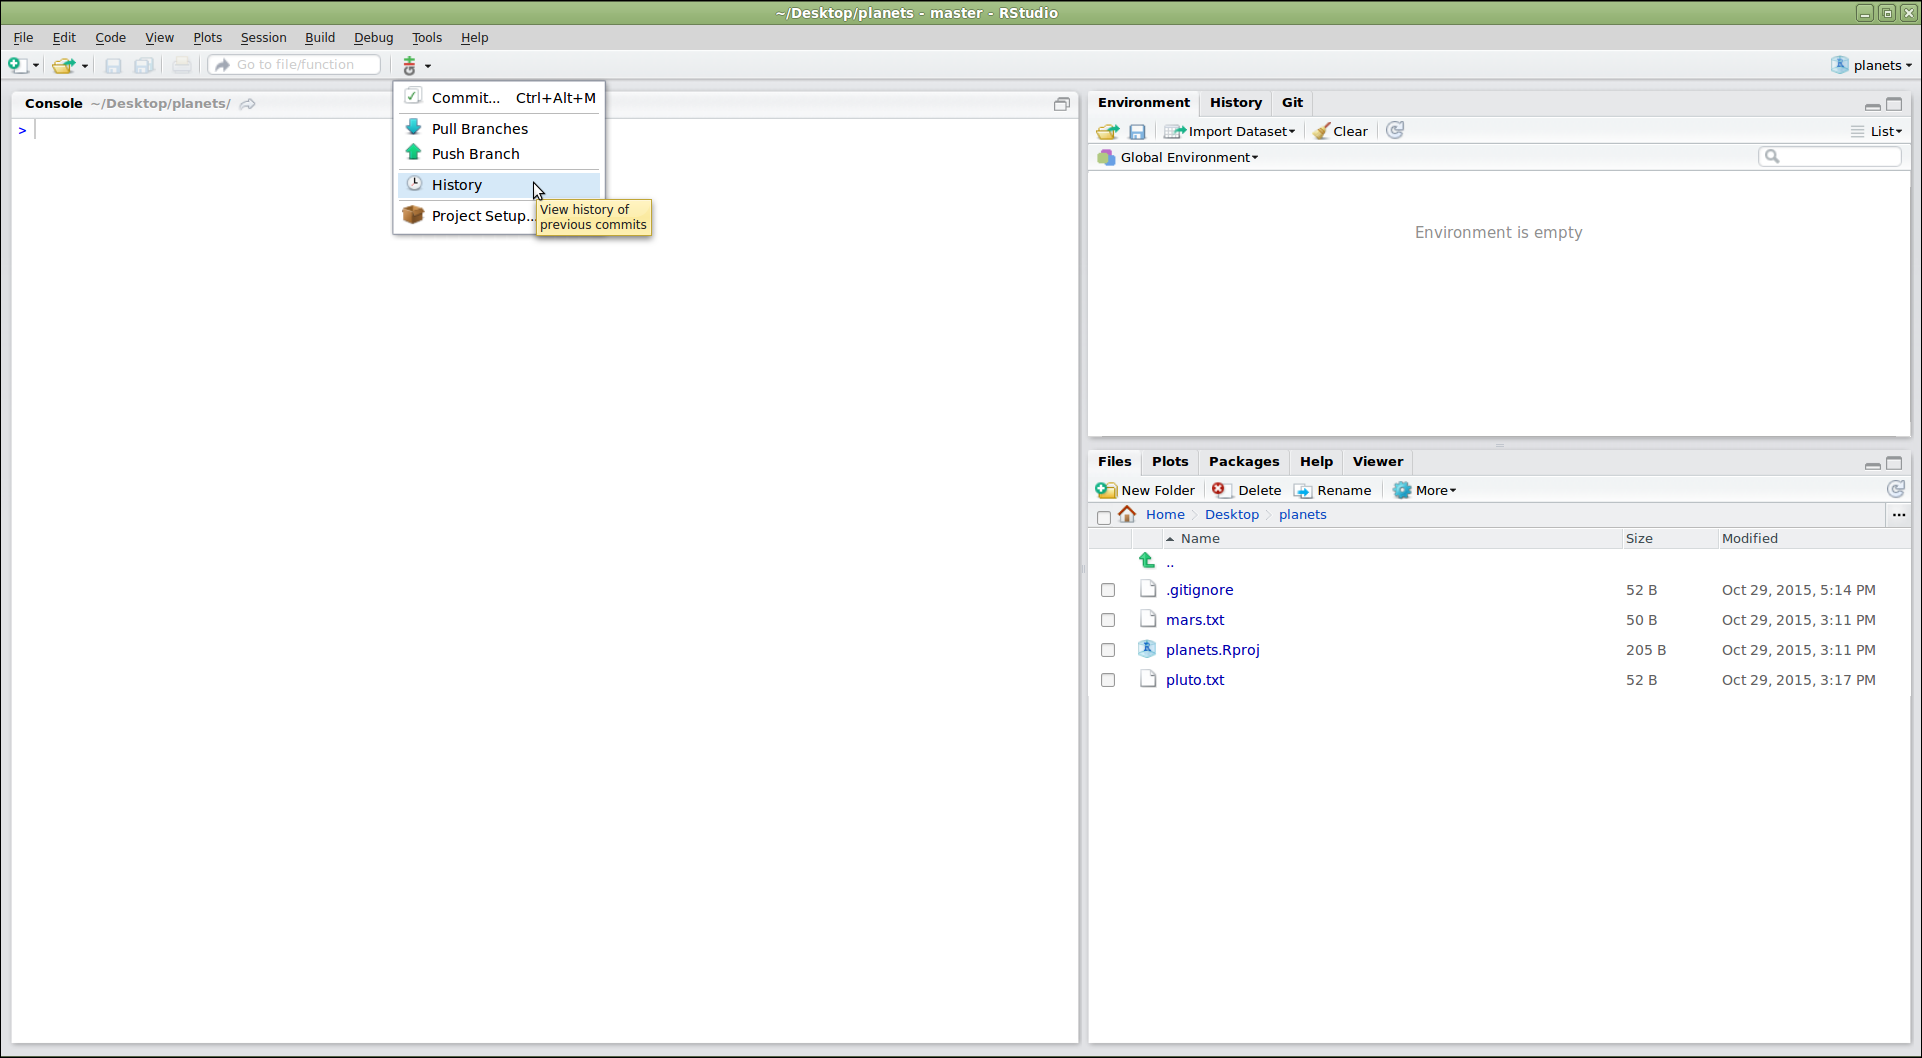
Figure 9
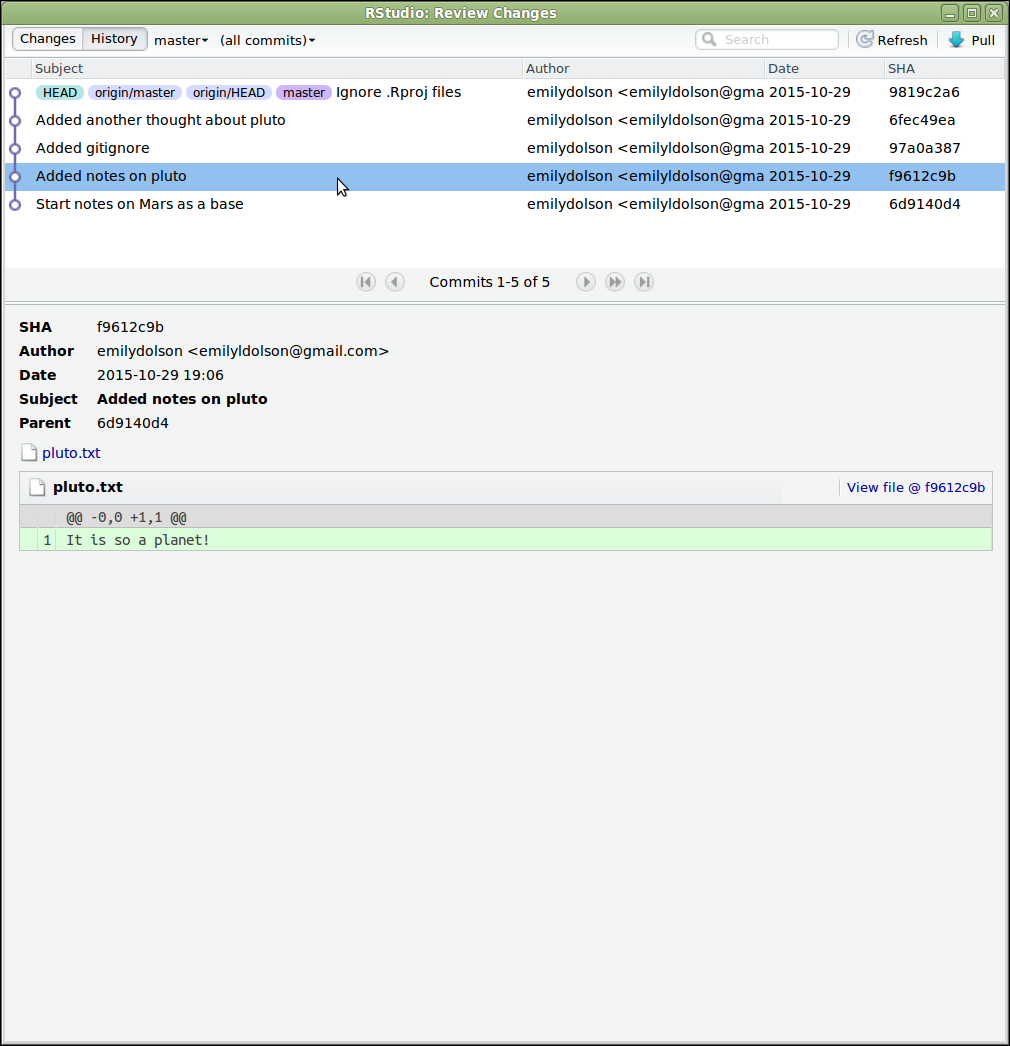
Figure 10
Setting up a Python ProjectStructuring a ProjectAdding Pre-commit checksLicensing complianceGitHub CI: unit tests and linting
Figure 1
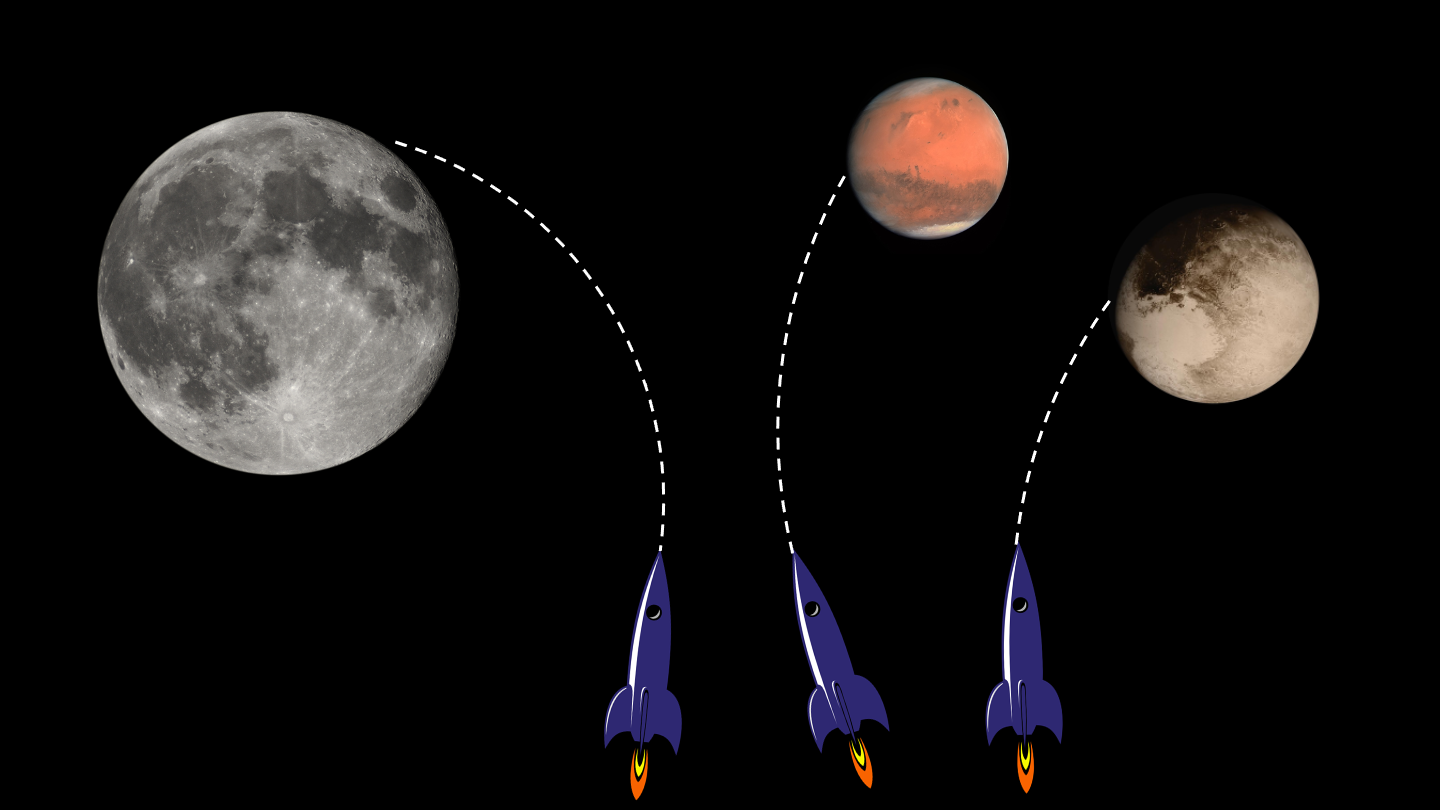 Mars
by European Space Agency / CC-BY-SA 3.0
IGO. Pluto
/ Courtesy NASA/JPL-Caltech. Moon ©
Luc Viatour / https://lucnix.be / CC BY-SA
3.0. Spacecraft
CC
0.
Mars
by European Space Agency / CC-BY-SA 3.0
IGO. Pluto
/ Courtesy NASA/JPL-Caltech. Moon ©
Luc Viatour / https://lucnix.be / CC BY-SA
3.0. Spacecraft
CC
0.
Collaborating - Branching and Pull RequestsForking a repositoryCreating a new branch with changesPushing a new branchAdd branch protection rules (requirements) in the base repositoryPull (Merge) RequestsKeeping up with upstream changes
Figure 1
To create a fork go on GitHub to the page of the repository you’d
like to fork, e.g. https://github.com/vlad/planets.git,
then click on the ‘fork’ button, close to the top roght of the windows:

Figure 2
A new page will let you choose the details of the fork: - the owner,
you or one of your organizations - the name of the repository, by
default the same as the forked repository (unless there is a conflict in
your space) 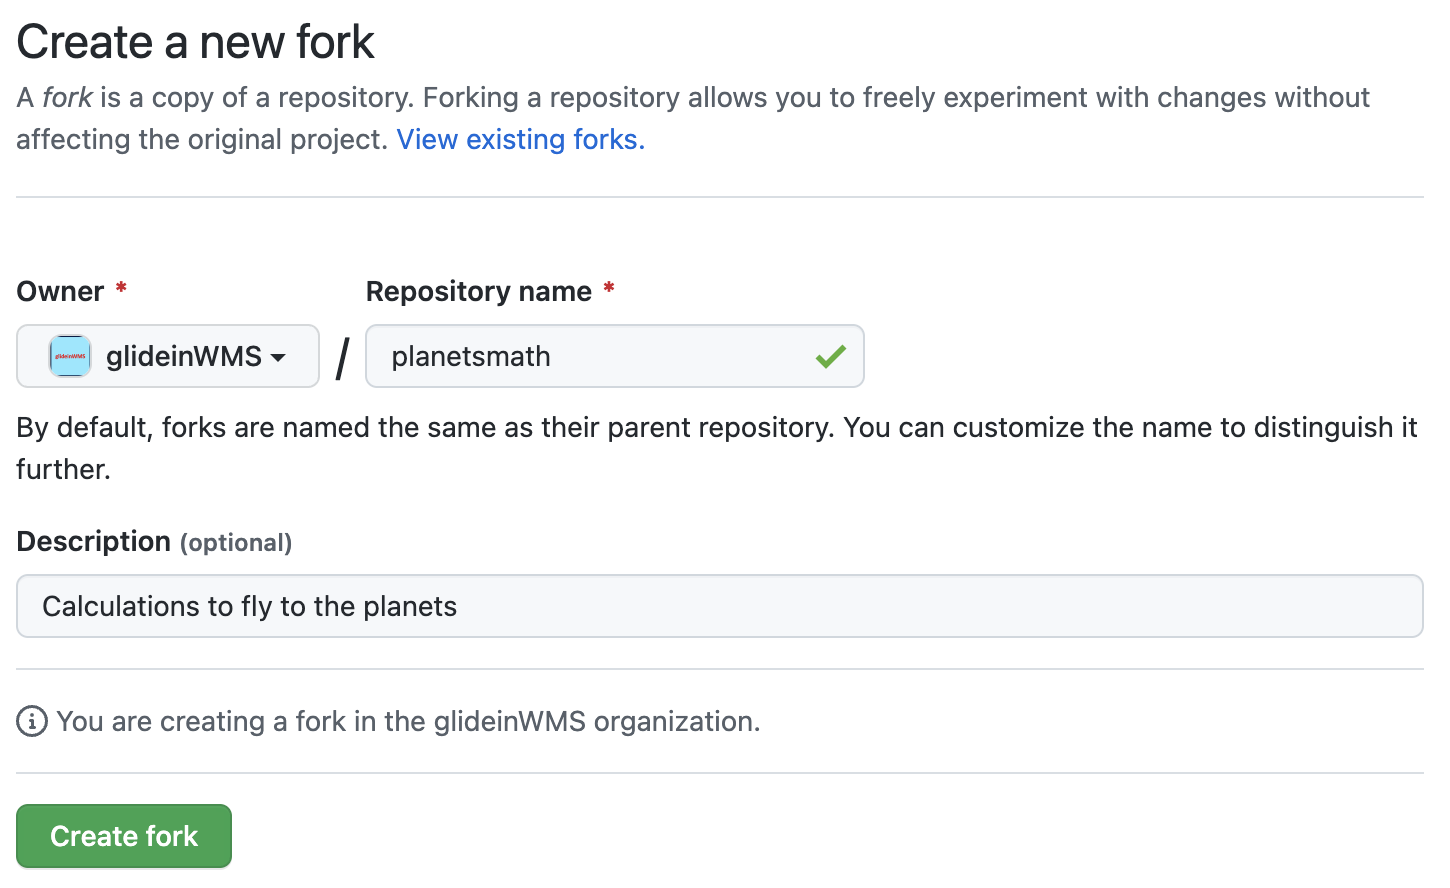
Figure 3
On GitHub, you can switch branches by using the little drop down
menu: 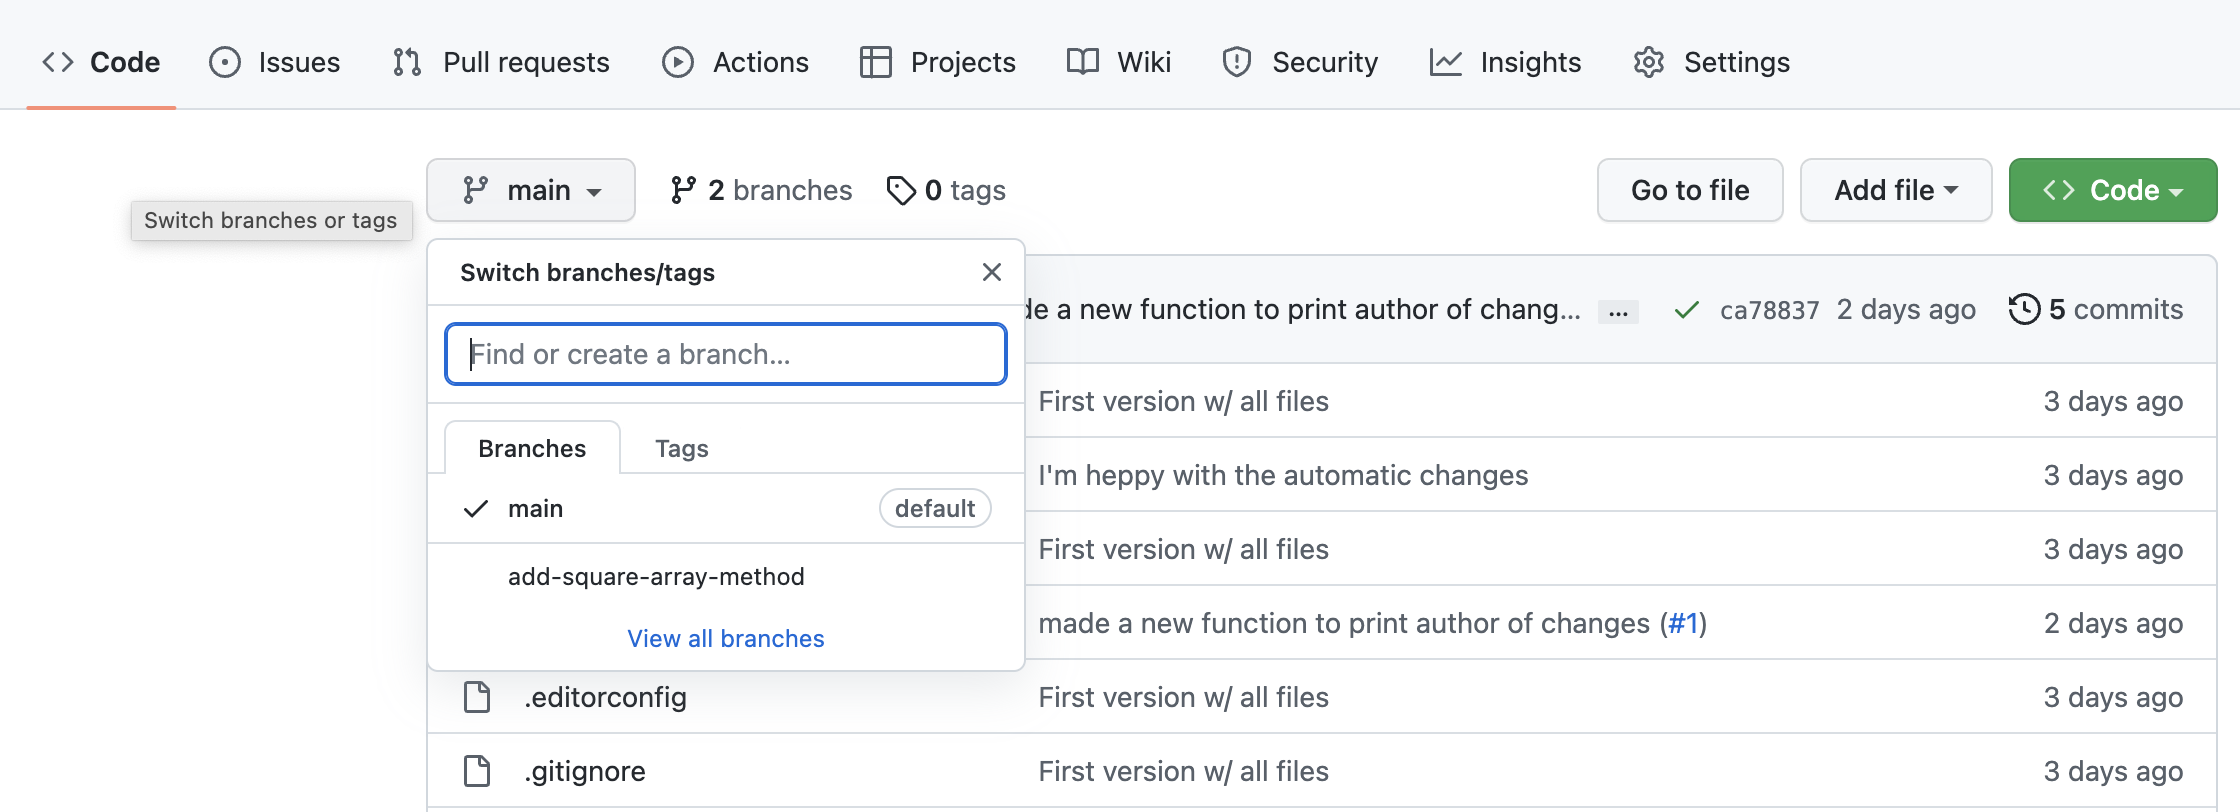
Figure 4
The easiest way to open a pull request is to use the URL suggested by
Git, like
https://github.com/wolfsman/planetsmath/pull/new/add-square-array-method
at the end of the previos section. Alternatively, go back to your
personal repository on GitHub and since it is the result of a fork, it
will have a pull-down “Contribute” that allows to “Open pull request”:

Figure 5
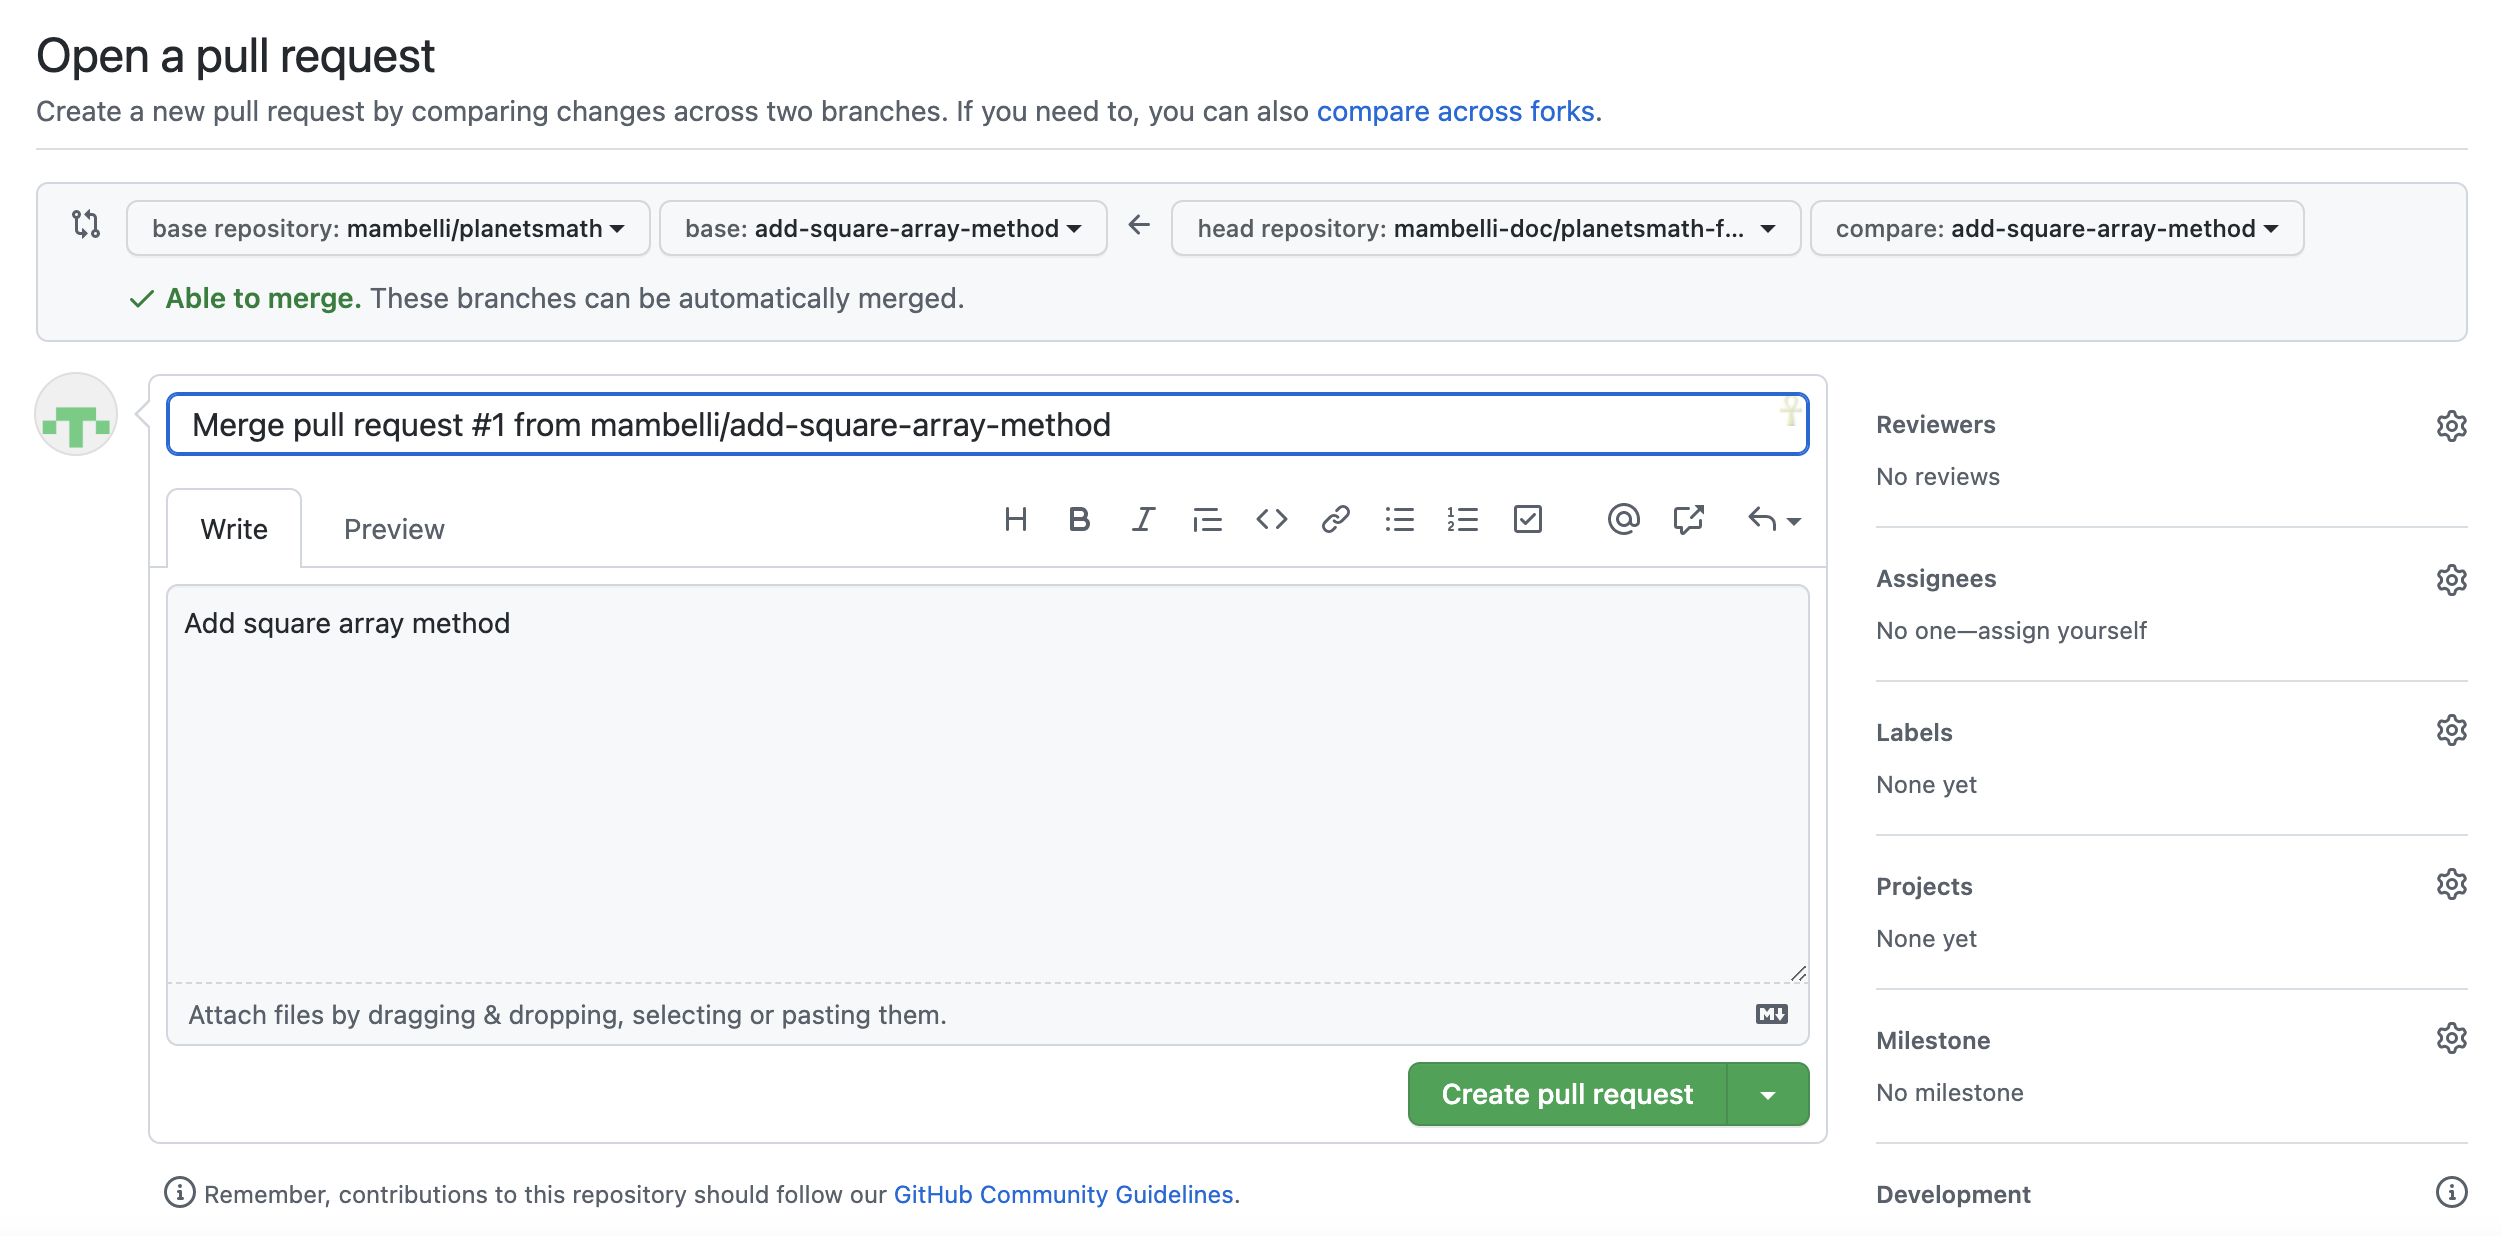
Either way you’ll get to a window where you can review and create the
pull request. The dialogue is pre-populated probably with the correct
values, anyway you can use dropboxes pick the source and destination
repository and branch, and a title and description (similar to the
comments in the Git commits). There are quite a few options. You should
generally write a description that tells you what the changes are. If
you are working on a project with other people, ‘Assignees’ are people
who will be implementing changes (i.e. you) and reviewers are people who
will check your work for any mistakes, code that could be written more
elegantly, etc. - it is very good practice to get your code reviewed
before merging and a GitHub project can also require that. Finally you
can compare the content and open the pull request: